Granting Proxy Access
As a Colorado Christian University student, you can grant others permission to access financial aid and payment information in your Self-Service account on the web. This is called granting “proxy access,” and you refer to the other person as your “proxy.”
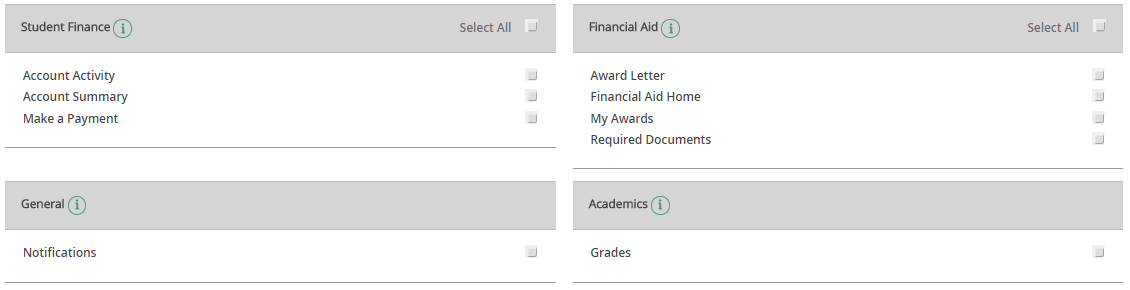
Students commonly grant parents or spouses access to their personal information. Currently, students can grant proxy access to "Make a Payment", "Account Activity/View Statement", "Grades" (final posted grades only), "Required Documents for Financial Aid" and "Financial Aid Awards". An additional area of access has recently been created – “Payment Plan & Billing”. Students who have granted proxy access to a parent or other third party in the past must add this new “Payment Plan & Billing” to give permission for their proxy to set up a payment plan on their behalf.
The proxy designation does not take the place of the protections afforded to the student under the Family Educational Rights and Privacy Act (FERPA). Release of a student’s non-directory educational records is still not allowed without the student’s written consent, including to parents, family members, and designated proxies. Students can complete a FERPA Release Form (student log in required) to provide outside parties additional access to their education records.
Instructions for Students
Log into Self-Service.
If you used the link above, you should be taken directly to the proxy management page. If you are not in the proxy page click the box with your name on the top right and choose “View/Add Person Proxy".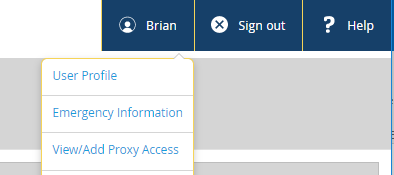
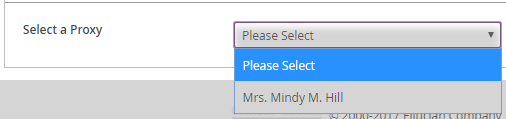
At the bottom of this page is the “Add a Proxy” area. Click on the drop down arrow and choose the person you want to grant proxy access to. Only family members with an email address already associated to your student record will be shown as options.
To add someone not listed, please email Registration Services using your CCU email account to update your information. You will need to provide your proxy’s first and last name, email address, city and state of residence, telephone number, and the proxy’s relationship to you. Please submit full, legal names only. Staff members may ask for additional information to help them identify the appropriate person in our database.
Please confirm that the listed email address for your proxy is current and correct, as their username and password will be sent to them at that address.
If the email address is not correct, DO NOT proceed with saving the page and finishing designating that person as your proxy. Instead, please email Registration Services using your CCU email account to update your proxy’s email address.
If the email address is correct, check the boxes to grant access to areas you want.
Then agree to the disclosure by marking the checkbox and click “Save” to finish.

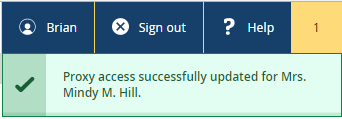
Upon successful submission you should see a notification at the top of the page.
And you will now see that person listed as an active proxy.
To later remove or change what your proxy has access to, click the pencil icon on the far right side of the Active Proxy. Upon saving the changes you will again see the notification of success at the top of the page. If you removed all access, that person will no longer appear in your active proxy list.
Instructions for Proxies
Upon your designation as a proxy by the student, if you are not already a proxy or otherwise have access to CCU's systems, you will receive an email with a link to Self-Service and your username, along with a second email containing your password. You will be prompted to change your password the first time you login.
If you need help with your password, enter your username and click "Continue" on Self-Service and the click "Forgot your password" and follow the prompts to enter your username and email as it matches on your account.
If you need help with your username click "Forgot your username" on Self-Service and follow the prompts to enter your name and email as it matches on your account.
If your email is incorrect on your account and you are not able to sign in, please email Proxy Support and include your name, the student's name, and the student's ID.
When you are ready to login, go to Self-Service and enter in your credentials. Once logged in, you will be prompted to choose if you want to work as yourself or as the student who granted you proxy access. Choose the student and click “Continue”.
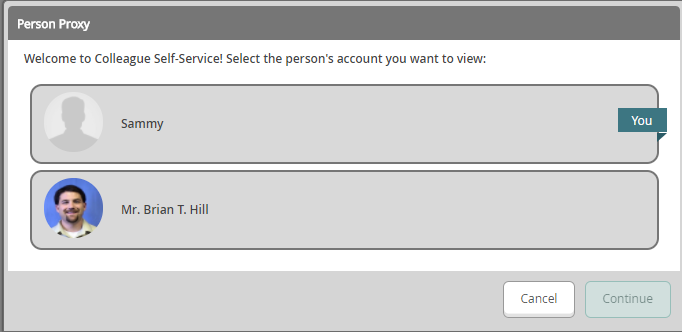
You will know you are acting for that person from the green bar at the top of the page.

Depending on what you have been granted access to you will see up to three categories to choose from. Click on one to take you to that area.


Instructions for Students
1. Go to Self-Service and click on the “Student Finance” tab
2. Click on “Students” under the “Make a Payment” section (on the right on a computer/at the bottom on a mobile device)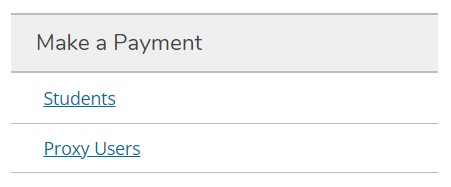
3. Click on "My Profile" tab
4. Click on "Authorized Users"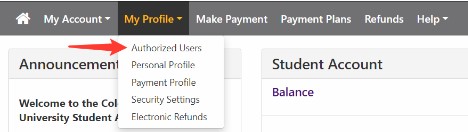
5. Click “Add Authorized User” tab
6. Input email for authorized user and select viewing permissions
(Note: This does NOT replace the FERPA Consent Form)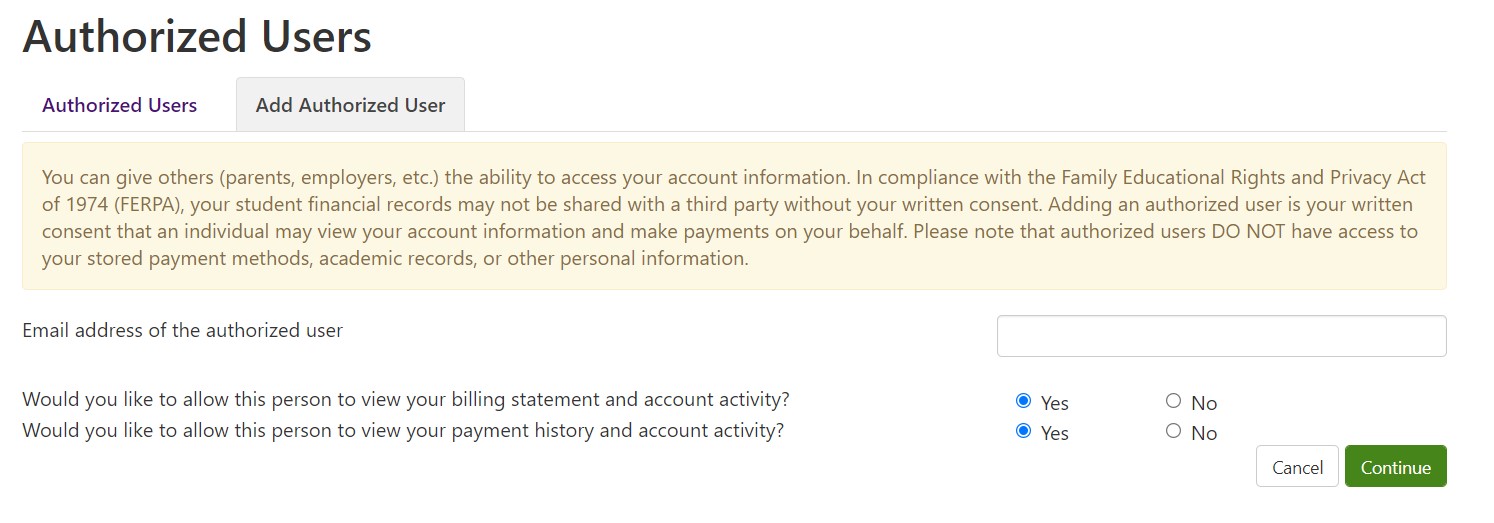
7. Follow directions in email
Instructions for Proxies
Once your student makes you an authorized user by following the steps above, you will receive two emails almost immediately with further instructions on how to finish setting up your access to the Billing & Payment Center along with temporary login information.
URL to TouchNet login page for authorized users only: secure.touchnet.net/C22795_tsa/web/login.jsp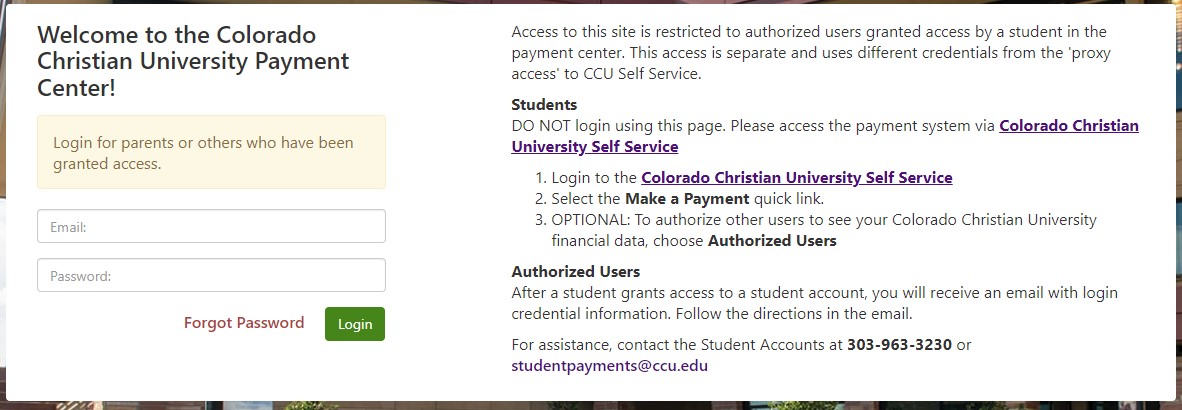
The first email you receive will provide the URL link directly to the Billing & Payment Center login page and your username (usually your email address), and the second email will provide a temporary password that will remain active for 24 hours.
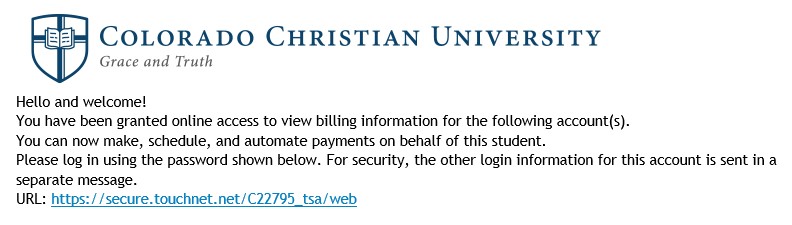
Once you log in using your username and temporary password, then you will be redirected to update your password and complete the two-step verification process by receiving a code (either by email or text) and entering that into the website.
FAQs
Which students can set up Proxy access?
Any student has the ability to set up Proxy access. The link can be found in the student’s Self-Service account.
Is a student required to set up Proxy access?
I’m a parent/spouse of a CCU student and would like access to my student’s online account. How can I gain Proxy access?
Can a Proxy call CCU if he or she has questions about a student account?
The person I want to designate as my proxy is not in the list of available proxy options. What should I do?
Can CCU staff make updates to what my proxy can view?
My parents (or spouse) are listed on my FERPA Release form, but they can’t access my student information online. Why?
My mom is already my proxy. Now my brother is a student here. Can she automatically access my brother’s information too?
My proxy forgot his/her password/username. What should they do?
Password: The proxy will enter their username and click "Continue" on Self-Service and follow the prompts to enter their username and email as it matches on their account.
Username: The proxy will click "Forgot your username" on Self-Service and follow the prompts to enter their name and email as it matches on their account.
The email address that is associated with my proxy is incorrect. How can I correct this information?
I want my designated proxy to make a payment plan on my account. How do I do that?
Set up access for your proxy in your Self-Service account, and select “Payment Plan and Billing” for your proxy’s permission. You may also want to add permission to Account Activity, Account Summary, and Make a Payment for your proxy’s benefit.
I've already designated a proxy to make a payment, but my proxy does not have access to set up a payment plan?
Students who have granted proxy access to a parent or other third party in the past must add “Payment Plan & Billing” to give permission for their proxy to set up a payment plan on their behalf. Log into Self-Service and select your Active Proxy. You can then add the Payment Plan permission to your Proxy’s designated accesses.